

I’ve been playing with origami, lately. Specifically, I’ve been exploring how to simulate, model, and fold origami shapes in ways that could be automated to create useful mechanisms. The system I’ve come up with is designed to fold rip-stop nylon, a material I’ve worked with at both Makani Power and Super-Releaser.
After some experiments with programs designed specifically for generating origami patterns, I found I wasn’t able replicate the patterns I’d prototyped in paper. Since I wanted to start out with a paper prototype, do some bench tests, and move to CAD from there, I needed to consider other options. I also wasn’t able to convert the output into a format that would play with CAD for printing and prototyping the resulting forms. So, I fell back on my old standard: SolidWorks. If you’ve worked with me before or you’re a regular reader, you don’t get any bonus points for guessing I’d find a way to turn this into a SolidWorks project. This video was very helpful for understanding how to think about origami in a SW context.


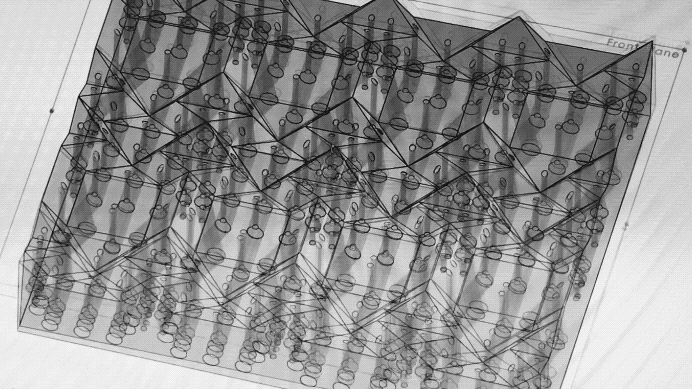
I took a couple of cracks at assemblies, and eventually came up with a fairly stable model where I could adjust the depth of fold without breaking relationships. The structure becomes more stable and less prone to inversion as more facets are added, which matches up pretty well to how folding tessellating shapes works in the real world.

I locked in the crease angle at a level I felt wouldn’t be too aggressive (potentially causing the nylon to buckle) while retaining enough depth to give the method a solid test. I tiled the pattern, turned it into a solid shape, and then added channels through the solid so I could pull a vacuum across its surface. This vacuum work holding design is pretty common in industrial machining. You’ll also find lots of vacuum tables on CNC routers as well. I even used it for work holding on the Bond robots.
The first printed prototype of this mechanism showed promise but needed further adjustments. I increased the diameter of all of the air channels for better flow, and added slots across the tops of the facets to pull vacuum evenly across their surfaces. This has the added benefit of reinforcing the suction effect. If there’s only a single hole in each printed facet through which air is being pulled, the vacuum pretty much doesn’t effect the rest of the material once that hole is plugged up. With slots added, any bit of the material that touches the jig increases the force of vacuum across the portion that isn’t stuck down yet. You can see some examples of this design pattern here.

There are some decisions that will need to be made as this design gets more sophisticated. This is currently operating on a flow model, where the system is kind of leaky but compensates by moving a large volume of air. Inflatable character costumes and bouncy castles operate on this model, and it’s a great way to inflate things without needing airtight seams anywhere. The disadvantage is that you’ve got to have a big blower to move that much air (I’m using a vacuum cleaner for this iteration) and most blowers can’t generate much static pressure. That means, once the nylon is pulled down, the blower tops out on how much suction it can generate, and the clamping force can only get as high as the effective area times the pressure differential minus whatever friction losses happen between the blower and the clamped material.
If you are able to seal off the seam between the jig and the material that’s being clamped (the vacuum jig designs I linked above use gaskets to generate this seal) then you don’t have to move much air to generate the clamping force. This means you can use pumps that trade off air volume displacement for pressure, like diaphragm pumps, piston pumps, or vane pumps. This arrangement generates huge amounts of clamping force, but breaks down when there’s even a tiny little air leak.

As I figure out how this prototype fits into a larger plan of manufacturing complex pneumatic actuators, I’ll have to decide whether the low clamping force and low precision of the system I’m using now is good enough to support the next processes in the chain, or will need to be scrapped in favor of a static vacuum design.
So far, this is a promising start, and I’m excited to explore the next bits of this system.